
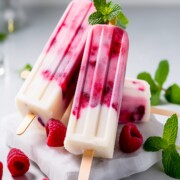
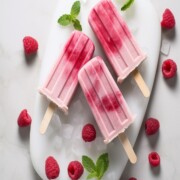
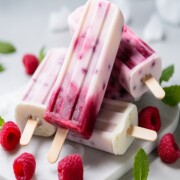
These Raspberry Vanilla Yogurt Popsicles are the perfect combination of fruity sweetness and creamy goodness. Made with fresh raspberries, smooth vanilla yogurt, and a touch of honey, these popsicles are a delightful summer indulgence that the whole family will love.

Raspberry Vanilla Yogurt Popsicles
Oh, let me tell you about the flavor of these Raspberry Vanilla Yogurt Popsicles – they are absolutely divine! The combination of sweet and tangy raspberries, creamy vanilla yogurt, and a hint of natural sweetness is pure bliss. With each lick, you'll experience a burst of fruity goodness that's oh-so-refreshing! The yogurt adds a creamy richness that balances perfectly with the bright raspberry flavor. It's like enjoying a frozen summer smoothie on a stick! These popsicles are a delightful treat that will keep you coming back for more. Trust me, they're a real crowd-pleaser and the perfect way to beat the heat!
Why You Should Make These Recipes:
- Delicious Flavor Combination: The pairing of tangy raspberries and creamy vanilla yogurt creates a harmonious balance of flavors that will leave your taste buds craving more.
- Nutritious Ingredients: Fresh raspberries are rich in antioxidants and vitamins, while yogurt provides probiotics and calcium for a healthy gut and strong bones.
- Quick and Easy: This recipe is incredibly simple to make, requiring just a few ingredients and minimal prep time.
- Family-Friendly Treat: These popsicles are kid-approved and a great way to get children excited about eating fruit and yogurt.
- Customizable: Feel free to add other fruits or even a drizzle of chocolate for a personalized touch.
Ingredients
- fresh raspberries: The star of the show, providing vibrant color and natural sweetness.
- vanilla yogurt: Adds a creamy and luscious texture, complementing the tartness of the raspberries.
- honey: Sweetens the popsicles and enhances the overall flavor profile.
- vanilla extract: Introduces a subtle vanilla undertone that elevates the taste.
Summarized Instructions:
- Wash the raspberries and puree them in a blender until smooth.
- In a mixing bowl, combine the raspberry puree, vanilla yogurt, honey, and vanilla extract. Mix until well incorporated.
- Pour the mixture into popsicle molds and insert popsicle sticks.
- Freeze the popsicles for at least 4-6 hours or until solid.
- Once frozen, remove the popsicles from the molds and enjoy!
Equipment Needed
- Blender or food processor
- Mixing bowl
- Popsicle molds
- Popsicle sticks
Ingredient Substitutions
- Fresh raspberries can be substituted with other berries like strawberries or blackberries.
- If you prefer a different flavor, opt for flavored yogurt such as strawberry or blueberry.
- Agave syrup or maple syrup can be used instead of honey.
Variations:
- Layer the raspberry mixture with yogurt for a visually appealing striped effect.
- Add a sprinkle of granola or crushed nuts to the popsicle molds for added texture.
Serving Suggestions
- Serve the popsicles as a refreshing dessert after a barbecue or summer meal.
- Drizzle melted chocolate over the popsicles for an indulgent twist.
Storage and Shelf Life Tips
Here are some tips on storing Raspberry Yogurt Popsicles and their shelf life:
- Storage: After making the popsicles, allow them to fully freeze in the popsicle molds. Once frozen, remove the popsicles from the molds and transfer them into an airtight container or a ziplock bag. Make sure to place parchment paper or wax paper between each popsicle to prevent them from sticking together.
- Freezer: Keep the popsicles in the freezer at a consistent temperature of 0°F (-18°C) or below. This ensures they stay frozen and maintain their texture and flavor.
- Shelf Life: Raspberry Yogurt Popsicles can typically last in the freezer for up to 2-3 months. However, for the best quality and taste, it's recommended to consume them within the first month.
- Labeling: To keep track of the freezing date, consider labeling the container or bag with the date of preparation. This will help you know when they are at their peak freshness.
- Avoid Frequent Thawing and Refreezing: Constantly thawing and refreezing the popsicles can lead to loss of texture and taste. Try to take out only the number of popsicles you plan to serve to avoid unnecessary thawing of the entire batch. Or store them in small batches of 2 or 4 in small zip locks
- Keep Away from Strong Odors: Ensure that the container or bag holding the popsicles is tightly sealed to prevent any absorption of strong odors from the freezer.
- Regularly Check for Freezer Burn: Check the popsicles periodically for any signs of freezer burn. Freezer burn can affect the taste and texture of the popsicles.
Expert Tips
- For a seedless raspberry puree, strain the blended raspberries through a fine-mesh sieve.
- To make these popsicles even creamier, use Greek yogurt instead of regular yogurt.
- For a creamier texture, you can use Greek yogurt instead of regular yogurt. It will add a rich and thick consistency to the popsicles.
- If you prefer a sweeter taste, you can adjust the amount of honey to your liking. Taste the mixture before freezing and add more honey if desired.
- To make these popsicles vegan-friendly, use dairy-free yogurt and substitute honey with agave or maple syrup.
- For a visually appealing effect, you can add a few whole raspberries to the molds before pouring in the raspberry yogurt mixture.
- If you have leftover raspberry yogurt mixture, you can store it in an airtight container in the refrigerator for up to 2 days and use it to make more popsicles later
- .To prevent the popsicles from sticking to the molds, avoid overfilling the molds and leaving some space at the top for expansion during freezing.
- You can also customize these popsicles by adding other fruits like blueberries or strawberries for a mixed berry twist.
Make Ahead Tips for a Crowd
- Prep the Ingredients in Advance: Before making the popsicles, you can prepare the raspberry puree and yogurt mixture ahead of time. Store them separately in airtight containers in the refrigerator.
- Assemble the Popsicles in Batches: If you're planning to make a large batch of popsicles, assemble them in batches. Fill a few popsicle molds at a time, allowing you to experiment with different flavor variations.
- Freeze Overnight for Best Results: For the creamiest and most flavorful popsicles, freeze them overnight or for at least 4-6 hours. This ensures that the popsicles set perfectly and have a smooth texture.
- Use Silicone Popsicle Molds: Silicone popsicle molds are flexible and easy to remove. You can make the popsicles in advance and release them from the molds just before serving.
- Double the Recipe: If you know the popsicles will be a hit, consider doubling the recipe and making extra. This way, you'll have a stash of delicious treats ready whenever you crave them.
- Cover the Popsicle Molds: If you need to store the popsicles in the freezer for an extended period, cover the molds with plastic wrap or aluminum foil to prevent freezer burn.
- Label and Date: If you're making multiple flavors of popsicles, label each mold with the flavor and date. This way, you can easily identify the different varieties.
- Serve with Garnishes: If you're serving popsicles at a party or gathering, prepare a variety of garnishes like crushed nuts, shredded coconut, or fresh fruit. Place them in separate containers, so guests can customize their popsicles.
- Store in Freezer-Safe Bags: If you need to free up space in the freezer, you can remove the popsicles from the molds once frozen and store them in freezer-safe bags.
- Transport in a Cooler: If you're taking popsicles to a picnic or outdoor event, transport them in a cooler with ice packs to keep them frozen and refreshing.
By following these make-ahead tips, you can enjoy these delectable Raspberry Vanilla Yogurt Popsicles anytime, whether it's a hot summer day or a special occasion.
FAQs: Answering Common Queries
- Can I use frozen raspberries for this recipe?
- Yes, you can use frozen raspberries if fresh ones are not available. Just make sure to thaw them before blending.
- Can I use Greek yogurt instead of regular yogurt?
- Absolutely! Greek yogurt will give the popsicles a creamier and thicker texture.
- How long do these popsicles take to freeze?
- It typically takes about 4-6 hours for the popsicles to freeze completely, but it's best to leave them overnight for the perfect consistency.
- Can I add other fruits to the popsicles?
- Yes, you can experiment with different fruits like strawberries, blueberries, or peaches to create your own fruity combinations.
- Are these popsicles suitable for lactose-intolerant individuals?
- If you are lactose-intolerant, you can use lactose-free yogurt or dairy-free alternatives like almond or coconut milk yogurt.
- Can I add sweeteners to adjust the sweetness level?
- Absolutely! Feel free to add honey, agave syrup, or any other sweetener of your choice to adjust the sweetness according to your taste.
- Are these popsicles kid-friendly?
- Yes, kids love the delightful combination of raspberry and vanilla in these popsicles. They make a great healthy treat for kids and adults alike.
- Can I make these popsicles ahead of time for a party or gathering?
- Absolutely! You can make these popsicles a day or two in advance and store them in the freezer until you're ready to serve.
- Can I use popsicle molds of different shapes and sizes?
- Yes, you can use various molds to create fun and unique popsicle shapes for added enjoyment.
- How can I prevent ice crystals from forming in the popsicles?
- To prevent ice crystals, make sure to blend the ingredients thoroughly and fill the molds to the top to minimize air pockets.
- Can I add crushed cookies or chocolate chips for extra texture?
- Yes, adding crushed cookies or chocolate chips can add a delightful crunch to the popsicles.
Enjoy your Raspberry Vanilla Yogurt Popsicles and feel free to reach out if you have any more questions!
Other Summer Desserts Recipes To Try
📖 Recipe

Raspberry Vanilla yogurt Popsicles
Ingredients
- 2 cups raspberries (Fresh or Frozen)
- 1 cup vanilla yogurt
- 2 tablespoons honey
- 1 teaspoon vanilla extract
Instructions
- Step 1 - Prepare the Raspberry Puree:Wash the 2 cups raspberries under cold water and pat them dry with a paper towel.
- In a blender or food processor, add the raspberries and blend until smooth and liquid-like. If you prefer a seedless puree, strain it through a fine-mesh sieve.
- Step 2 - Mix the Ingredients:In a mixing bowl, combine the raspberry puree, 1 cup vanilla yogurt 2 tablespoons honey 1 teaspoon vanilla extract
- Stir the mixture until all the ingredients are well incorporated, and you have a smooth and creamy consistency.
- Step 3 - Fill the Popsicle Molds:Carefully pour the raspberry yogurt mixture into popsicle molds, leaving a small gap at the top to allow for expansion during freezing.
- Gently tap the molds on the counter to release any air bubbles and ensure the mixture settles evenly.
- Step 4 - Insert Popsicle Sticks:Place the popsicle sticks into the center of each mold, ensuring they are upright and securely embedded in the mixture.
- Step 5 - Freeze the Popsicles:Transfer the filled popsicle molds to the freezer.
- Allow the popsicles to freeze for at least 4-6 hours or preferably overnight until they are solid and set.
- Step 6 - Unmold and Serve:To unmold the popsicles, run warm water over the outside of the molds for a few seconds. This will help loosen the popsicles.
- Gently pull the popsicles out of the molds one by one and place them on a serving plate.
Notes
- For a creamier texture, you can use Greek yogurt instead of regular yogurt. It will add a rich and thick consistency to the popsicles.
- If you prefer a sweeter taste, you can adjust the amount of honey to your liking. Taste the mixture before freezing and add more honey if desired.
- To make these popsicles vegan-friendly, use dairy-free yogurt and substitute honey with agave or maple syrup.
- For a visually appealing effect, you can add a few whole raspberries to the molds before pouring in the raspberry yogurt mixture.
- If you have leftover raspberry yogurt mixture, you can store it in an airtight container in the refrigerator for up to 2 days and use it to make more popsicles later.
- To prevent the popsicles from sticking to the molds, avoid overfilling the molds and do leave some space at the top for expansion during freezing.
- You can also customize these popsicles by adding other fruits like blueberries or strawberries for a mixed berry twist.


Leave a Reply