
Tips FOr baking perfect pies, Nothing quite compares to the allure of a perfectly baked pie. The golden-brown crust, the mouthwatering filling, the irresistible aroma – it's a dessert that embodies comfort and nostalgia. However, achieving pie perfection requires more than just a good recipe. It involves mastering various elements, from creating the ideal pie crust to getting the fillings right, mastering the baking process, and knowing how to cool and slice your masterpiece. In this comprehensive guide, we'll delve into each of these aspects to help you become a pie-baking pro.

Jump to:
The Perfect Pie Crusts
1. Flour and Fat: The Foundation of Flakiness
Creating the perfect pie crust is akin to crafting a delicate work of art, and it all commences with the choice of the right ingredients. The classic combination of all-purpose flour and cold fat, such as butter or shortening, forms the backbone of your quest for flakiness. Here's why this foundation is crucial:
- Flour: All-purpose flour is the primary dry ingredient. It provides structure and stability to the crust. The proteins in the flour, glutenin and gliadin, form gluten when mixed with liquid. Gluten is necessary for structure but should be minimized for a tender crust.
- Cold Fat: The choice of fat is pivotal. Butter and shortening are popular options. The cold fat is crucial for creating the desired flakiness. When the cold fat hits the hot oven, it rapidly melts and creates steam, which puffs up the layers of the dough, resulting in a flaky, tender texture.
- Cutting the Fat: To achieve the perfect pie crust, ensure the fat is well-chilled and cut into the flour until you achieve a coarse, breadcrumb-like consistency. These fat "pebbles" will be dispersed throughout the dough, creating pockets as they melt during baking, further contributing to the desired flakiness.
2. Liquid Magic: Binding the Dough
The key to a tender, flaky pie crust lies in the art of binding the dough with just the right amount of liquid. Liquid is the magic ingredient that brings the dry ingredients together. Here's why it's essential:
- Water Temperature: Ice water is often the liquid of choice when making pie dough. It maintains a low dough temperature, which is critical for preventing the fat from melting too soon. Cold water ensures that the fat particles remain intact, creating those coveted pockets of flakiness.
- Gradual Addition: Add the liquid gradually, using just enough to bring the dough together. Overworking the dough can lead to the formation of excess gluten, resulting in a tougher, less tender crust. The goal is to mix until the dough just holds together; it may seem a bit shaggy, but this is perfectly fine.
3. Rest and Chill: The Dough's Best Friends
The dough, once mixed to the right consistency, needs some quality time in the refrigerator. Rest and chill are the dough's best friends for the following reasons:
- Relaxing the Gluten: Resting the dough in the refrigerator for at least 30 minutes allows the gluten strands that formed during mixing to relax. Gluten can make the dough tough, and this rest period ensures that your pie crust will be tender and not chewy.
- Easier Rolling: The chilled dough is easier to roll out without it shrinking or cracking. During this time, the flour in the dough fully hydrates, making it less sticky and more manageable.
4. Rolling Out: Tips for a Perfect Crust
Rolling out the dough is where you shape your pie crust, and precision is key. Here are some tips to help you achieve that perfect crust:
- Even Thickness: Roll the dough on a floured surface from the center outward, turning it as you go to maintain an even thickness. Aim for a circle about 1-2 inches larger than your pie dish. An even thickness ensures that your pie crust will bake evenly, preventing overdone edges and an undercooked center.
5. Transferring the Crust: Keep It Intact
Transferring the rolled-out crust to your pie dish without tearing it can be a delicate operation. Here's how to do it while keeping the crust intact:
- Gentle Folding: Gently fold the rolled-out crust in half, then in quarters. This technique makes it easier to handle the dough without tearing it.
- Unfolding: Place the point where the folds meet in the center of the pie dish, then carefully unfold the crust to cover the entire dish. Use your hands or a piece of wax paper to gently press the dough into the pan, ensuring it conforms to the dish's shape without stretching or tearing. This technique helps avoid any gaps or thin spots in the crust, which could lead to a soggy bottom or uneven baking.
Mastering these elements in the quest for the perfect pie crust sets the stage for a truly exceptional pie-baking experience. From the choice of ingredients to the precise handling of the dough, each step plays a crucial role in achieving the coveted balance of flakiness and tenderness that defines a truly outstanding pie crust.
Pre-bake or Blind bake the Pie Crust
Pre-baking a pie crust, also known as blind baking, is a transformative technique that sets the stage for pie-making excellence. In the world of pies, where the contrast between a crisp, flaky crust and a delectable filling defines perfection, pre-baking is the foundation upon which this delicate balance is achieved.
This essential step serves a multitude of purposes. It prevents a soggy bottom crust by creating a protective barrier between the crust and the filling, ensuring that the crust retains its integrity. Pre-baking also ensures the crust is fully cooked, regardless of the baking time required for the filling, avoiding any unwelcome doughiness. For custard and cream pies, it acts as a safeguard, preventing cracks or curdling in these sensitive fillings.
The crust's structure and texture are enhanced through pre-baking, as it prevents puffing and air bubbles, and it allows for precise browning control, ensuring that the bottom crust remains just as delectable as the top.
Furthermore, the initial bake during pre-baking infuses the crust with a golden-brown, flavorful foundation, enhancing the overall pie experience. Pre-baking is the first brushstroke on the canvas of a pie, a technique that, when mastered, ensures each slice offers the perfect balance of texture, flavor, and visual appeal.
Getting the Fillings Right
6. The Filling's Sweet Spot: Balance of Flavors
The art of pie filling lies in striking the right balance of sweet, tart, and any other flavor elements. Taste your fruit or custard filling to adjust the sugar and acid as needed before assembling the pie.
7. Thickening Agents: To Ensure Set Filling
Common thickeners like cornstarch or tapioca help prevent a runny filling. Sprinkle them evenly over the bottom crust before adding the fruit or filling.
8. Layering: Avoiding Soggy Bottoms
For fruit pies, consider creating a thin layer of crumbs or finely ground nuts on the crust's bottom to act as a barrier against a soggy crust.
9. Top It Off: Lattice, Crumb, or Double Crust?
Choose the right topping for your pie – a classic double crust, a decorative lattice, a streusel crumb, or perhaps a meringue for a lemon pie. Each adds a unique texture and flavor.
Baking it Right: Perfect Time and Temperature
Baking the perfect pie is all about striking the right balance between time and temperature. Get it right, and you'll achieve that golden-brown crust and perfectly set filling that defines a delectable pie. Here are some essential tips to master the art of pie baking when it comes to time and temperature:
1. Preheat for Success:
Preheating your oven is a critical first step. The initial blast of high heat is essential for setting the crust and ensuring it stays crisp. Pie crusts depend on a sudden burst of heat to puff up and form those flaky, golden layers. Preheat your oven to the temperature specified in your recipe, usually around 375°F to 425°F (190°C to 220°C), and let it come to temperature before you put the pie inside.
2. Know Your Pie Type:
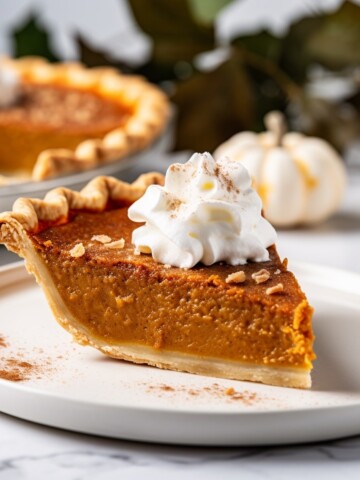
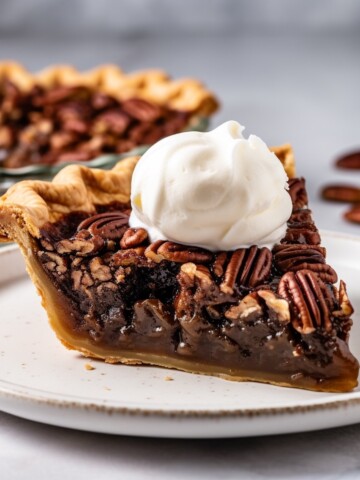
Different types of pies require different time and temperature settings. For fruit pies, such as apple or cherry, a moderate to high temperature (around 375°F to 400°F or 190°C to 200°C) is usually appropriate. For custard or cream pies, like pumpkin or pecan, a slightly lower temperature (around 325°F to 350°F or 160°C to 175°C) is better to prevent the filling from curdling or cracking.
3. Shield Your Crust:
During baking, the exposed edges of your pie crust are particularly susceptible to over-browning. To avoid burnt or excessively dark crust edges, consider using aluminum foil or a pie crust shield. Cover the outer edges of the crust before placing the pie in the oven. This shield can be removed during the last 10-15 minutes of baking to allow for even browning.
4. Doneness Tests:
Knowing when your pie is perfectly baked is a skill that comes with experience. There are a few indicators to look for:
- Bubbling: For fruit pies, check for bubbling in the center of the pie. When the fruit filling is bubbling, it's a sign that the pie is heated through and the thickening agents are working. This typically occurs around the edges and in the center.
- Jiggle: Custard or cream pies should have a slight jiggle in the center when you gently nudge them. The filling should look set at the edges but have a slight wobble in the center. It's essential not to overbake custard pies to avoid cracking.
- Toothpick or Knife Test: Insert a toothpick or knife into the center of the pie, then remove it. If it comes out clean, without any wet filling clinging to it, the pie is likely done.
5. Pay Attention to the Crust:
The crust's color is a good indicator of doneness. Look for a golden-brown hue. If the crust edges start to get too dark, you can cover them with foil to prevent further browning while allowing the filling to continue cooking.
6. Avoid Rapid Cooling:
Once your pie is done, resist the urge to slice into it immediately. Allowing it to cool is crucial for setting the filling. Rapid cooling can cause moisture to form between the filling and the crust, leading to a soggy bottom. Place the pie on a wire rack and let it cool for at least 2-3 hours at room temperature.
7. Room Temperature Slicing:
When it's finally time to slice your pie, use a sharp, clean knife dipped in hot water. This prevents the knife from sticking to the filling and ensures clean, neat slices. Repeat the dipping process between each cut for the best results.
When it's time to slice, use a sharp, clean knife dipped in hot water. This will help you achieve clean, neat slices without crumbling.
Do's and Don'ts of Baking Pies
Baking a perfect pie can be a rewarding culinary experience, but it requires careful attention to detail. Here are some essential do's and don'ts to help you achieve pie-baking success:
Do's:
- Do Use Cold Ingredients: Use cold fats (butter, shortening, or lard) and cold water when making pie crust. Cold ingredients help create a flaky texture by forming steam when they hit the hot oven.
- Do Measure Ingredients Precisely: Use a kitchen scale to measure ingredients accurately. Accurate measurements are crucial for achieving the right texture in both the crust and filling.
- Do Preheat Your Oven: Always preheat your oven to the temperature specified in your recipe before placing the pie inside. Preheating is essential for setting the crust and ensuring even baking.
- Do Use a Pie Shield: If your pie crust edges start to brown too quickly, use a pie shield or aluminum foil to cover them. This prevents over-browning while allowing the filling to continue cooking.
- Do Perform Doneness Tests: Know when your pie is perfectly baked. For fruit pies, look for bubbling in the center. Custard or cream pies should have a slight jiggle in the center when gently nudged. Use a toothpick or knife to ensure the pie is done; it should come out clean.
- Do Allow Cooling Time: Let your pie cool for at least 2-3 hours at room temperature before slicing. Cooling allows the filling to set and ensures cleaner slices.
- Do Store Properly: If you have leftovers, store the pie in the refrigerator to maintain freshness. Fruit pies can be stored at room temperature for a day, while custard pies should always be refrigerated.
- Do Experiment with Flavors: Don't be afraid to get creative with your pie fillings. Experiment with various fruits, spices, and flavor combinations to create unique and delicious pies.
- Do Use Fresh, High-Quality Ingredients: Fresh and high-quality ingredients, such as seasonal fruits, real vanilla extract, and premium chocolate, can significantly enhance the flavor of your pies.
- Do Vent Your Pie: Always remember to vent your pie by creating slits or a decorative pattern in the top crust. Venting allows steam to escape, preventing the filling from becoming too watery or the crust from getting soggy.
- Do Egg Wash for Shine: For a beautiful, shiny crust, consider brushing it with an egg wash made by whisking an egg yolk with a tablespoon of water. This gives your pie a glossy finish and adds to its visual appeal.
- Do Time Your Baking: Keep an eye on your pie while it's baking. Use a timer to ensure that it doesn't overcook or undercook. Different pie recipes have different optimal baking times, so follow your specific recipe's instructions.
Don'ts:
- Don't Use Warm Ingredients: Avoid using warm fats or water in your pie crust. Warm ingredients can cause the fat to melt prematurely and result in a tough crust.
- Don't Overwork the Dough: When mixing the pie dough, handle it as little as possible. Overworking the dough can lead to the formation of excess gluten, resulting in a tough crust.
- Don't Skip Resting Time: After forming the dough, always let it rest in the refrigerator for at least 30 minutes. Resting allows the gluten to relax and prevents the dough from shrinking or cracking when rolled out.
- Don't Skip the Pie Shield: Neglecting to protect your crust edges can lead to over-browning or burning. Always use a pie shield or foil to cover the edges if necessary.
- Don't Rush the Cooling Process: Avoid the temptation to slice into your pie immediately after baking. Rapid cooling can lead to moisture forming between the filling and the crust, resulting in a soggy bottom.
- Don't Store Custard Pies at Room Temperature: Custard or cream pies should never be left at room temperature for extended periods. These pies must be refrigerated to prevent spoilage.
- Don't Forget to Vent: When adding a top crust, don't forget to create vents (slits or a decorative pattern) to allow steam to escape. This prevents the filling from bubbling over or becoming too soggy.
- Don't Overload the Filling: Avoid overfilling your pie with too much filling, as it can lead to overflowing and a messy oven. Follow your recipe's guidelines for the appropriate amount of filling.
- Don't Overdo the Sugar: While sweetness is a key element in most pies, resist the temptation to add excessive sugar. Overly sweet pies can mask the natural flavors of the filling. Taste your filling as you go and adjust the sugar accordingly.
- Don't Rush Cooling: After baking, avoid speeding up the cooling process by placing the pie in the fridge immediately. Sudden temperature changes can affect the texture and result in a less-than-perfect pie.
- Don't Underestimate Soggy Bottoms: To prevent a soggy bottom crust, consider using a layer of finely ground nuts or crumbs (like graham crackers or cookies) as a barrier between the crust and the filling in fruit pies.
- Don't Forget Flavor Synergy: When experimenting with flavor combinations, be cautious of elements that might clash or overpower each other. Aim for a harmonious blend of flavors that complement one another.
- Don't Neglect the Oven Light: If you want to check on your pie without opening the oven, use the oven light to avoid sudden temperature fluctuations that can affect the baking process.
By following these additional do's and don'ts, you'll further enhance your pie-baking skills and create pies that not only taste incredible but also look stunning. Baking is both a science and an art, and perfecting the art of pie making can be a truly rewarding culinary journey.



Leave a Reply